 Save
Save
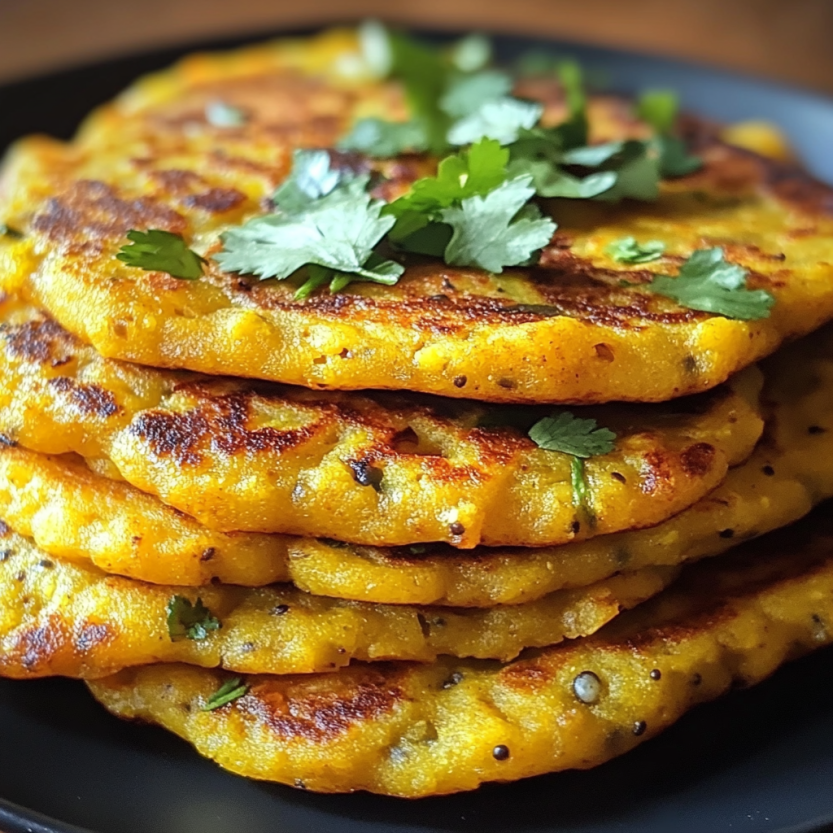
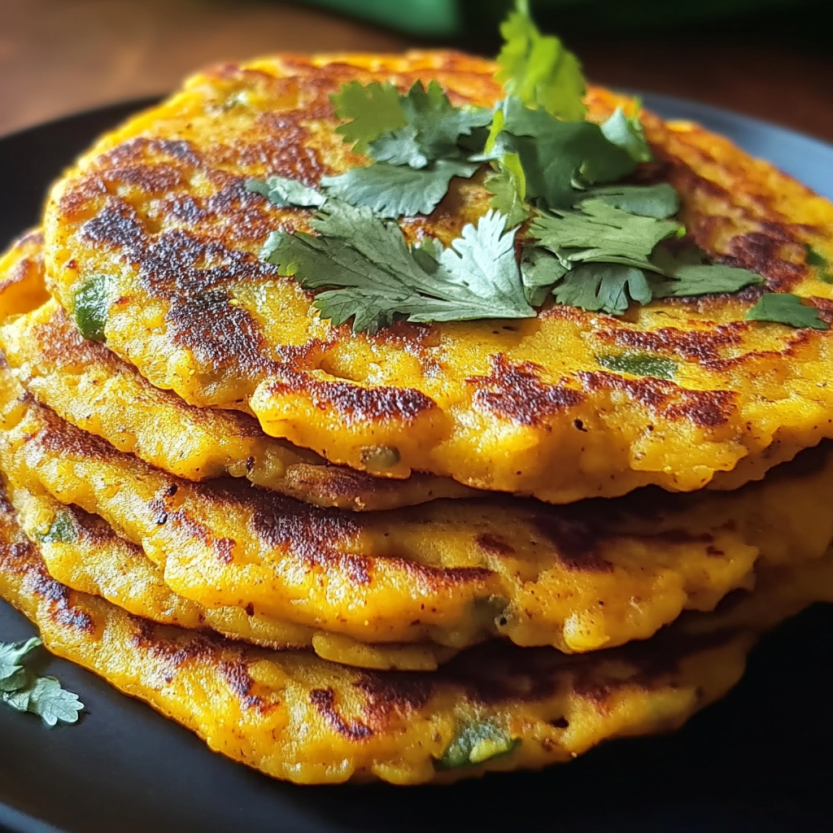
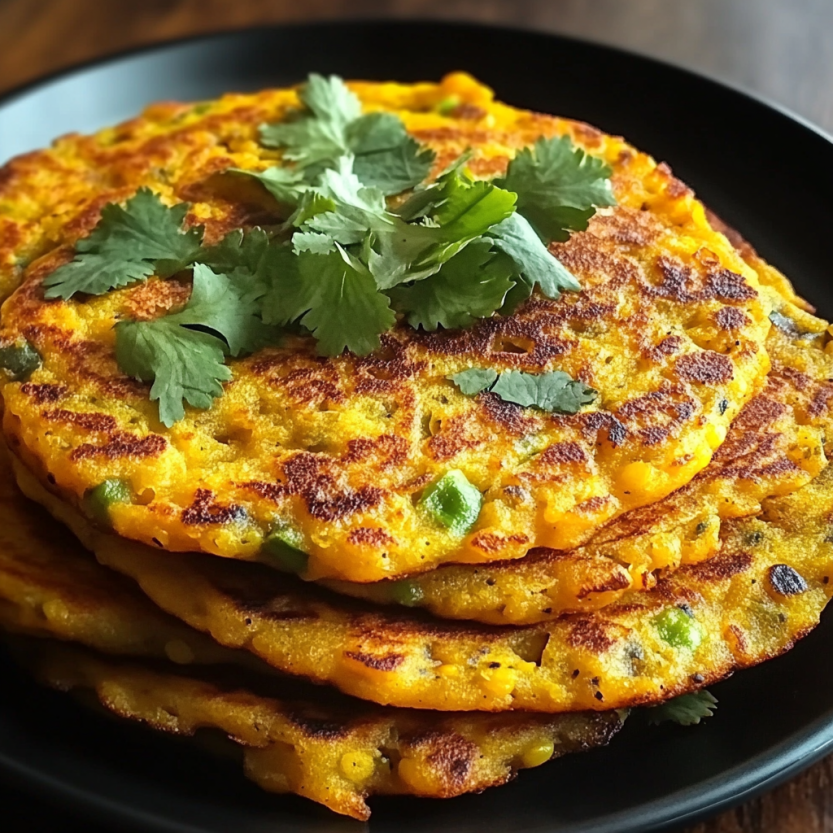
Moong dal chilla is a protein-packed savory pancake made from lentils that always brings warmth and color to busy mornings in my kitchen It is a favorite when you want something hearty satisfying and naturally gluten free in under forty minutes
I discovered this recipe while searching for ways to fit more legumes into my diet and it quickly became my go-to for quick fuss-free weekday breakfasts My family loves how customizable it is and every batch vanishes within minutes
Ingredients
- Moong dal split yellow lentils: provide the protein base look for fresh clean lentils without debris or musty smell
- Chopped onions: bring sweetness and subtle savory depth use crisp and firm onions
- Grated carrots: add a gentle sweet crunch and a pop of color choose bright firm carrots
- Chopped bell peppers: lend juiciness and color any color works but red and green are especially nice together
- Green chilies: finely chopped for freshness and a personal hit of heat buy glossy chilies and remove seeds for less spice
- Cumin seeds: offer an earthy aroma whole seeds unlock the flavor as they sizzle on the pan
- Turmeric powder: gives a warm color and mild earthiness opt for quality fresh ground for the brightest yellow
- Red chili powder: optional for extra kick use pure chili powder not a blend for consistent flavor
- Salt: to taste always taste your batter before cooking and add a pinch more if needed
- Water: adds moisture to reach that pancake-batter consistency filtered water is best
- Oil or ghee for frying: helps create those crispy edges I love the flavor of homemade ghee here
- Fresh coriander leaves for garnish: brightens every bite finely chop for easy sprinkling
Step-by-Step Instructions
- Soak the Lentils:
- Rinse the moong dal under running water until it runs clear Place in a bowl with plenty of water so the lentils stay submerged and soak for at least three hours or overnight This softens the lentils making for a smoother batter and improved digestibility
- Blend into Batter:
- Drain the soaked dal and add to a blender Add just enough water to allow blades to move smoothly and blend until you have a creamy yet pourable batter The goal is a thick but spreadable texture like classic pancake batter
- Mix in Veggies and Spices:
- Transfer the batter to a large bowl Stir in chopped onions grated carrots bell peppers chopped green chilies and cumin seeds Sprinkle in turmeric powder red chili powder if using and salt Mix gently but thoroughly making sure everything is evenly distributed
- Prepare the Pan:
- Warm a nonstick skillet or tawa over medium heat Once hot use a brush or paper towel to coat with a thin layer of oil or ghee ensuring the surface is evenly greased for best crispness
- Spread the Batter:
- Ladle a portion of batter onto the pan Carefully spread into a circle starting from the center outward to about quarter inch thick This helps the chilla cook evenly and crisp up at the edges
- Cook the First Side:
- Let cook for two to three minutes until the edges turn golden and the bottom releases easily from the pan Drizzle a few drops of oil around the edges to promote browning and extra crunch
- Flip and Cook Other Side:
- Gently flip using a flat spatula Press lightly and cook another two to three minutes until second side is browned and the surface is cooked through
- Finish and Repeat:
- Remove the finished chilla to a plate Continue with remaining batter adding a bit more oil or ghee to the pan between each batch Stack them as you go to keep warm
- Garnish and Serve:
- Sprinkle with finely chopped coriander leaves for a fragrant finish Serve hot straight from the pan alongside green chutney cool yogurt or the sauce you love most
 Save
Save
My favorite part is the cumin seeds as they create tiny bursts of nutty spice in every mouthful I remember a family brunch when my little one insisted on adding extra carrots and that version still gets requested every weekend
Storage Tips
Store leftover chillas in an airtight container in the refrigerator for up to three days They taste great cold but can also be reheated on a hot dry skillet or in the toaster Avoid microwaving as this will soften their lovely crisped edges For longer storage freeze chilla layers separated by parchment and reheat straight from the freezer in a pan
Ingredient Substitutions
Swap in chopped spinach grated zucchini or shredded cabbage for the carrots and bell peppers if desired Brown lentils also work if you soak them a little longer Skip green chili for kids or try black pepper for a milder spice Cumin powder is okay but whole seeds are best for flavor
Serving Suggestions
Serve hot chilla with mint green chutney tangy tomato ketchup or cooling plain yogurt Pair with chai for a complete breakfast I sometimes roll them up with extra sautéed veggies or use two chillas as a savory sandwich wrap
 Save
Save
Cultural Notes
Moong dal chilla is a popular street breakfast across North India cherished for its speed and nutrition The basic batter is endlessly adaptable and the chilla’s simplicity means it shows up for big celebrations and weekday lunches alike My family calls it Indian pancake though it is more savory than sweet
Recipe Questions
- → What makes moong dal chilla high in protein?
Moong dal is a protein-rich lentil, forming the batter's base and making each pancake naturally high in protein.
- → Can I add other vegetables to moong dal chilla?
Absolutely, you can mix in vegetables like spinach, grated zucchini, or tomatoes based on your preference.
- → What is the best way to serve moong dal chilla?
Serve hot with green chutney, yogurt, or a tangy tomato sauce for extra flavor and freshness.
- → Is soaking moong dal necessary before blending?
Yes, soaking softens the lentils, making them blend into a smooth batter for an even, fluffy pancake.
- → How do I get my chilla crispy?
Cook the chilla over medium heat with a light drizzle of oil until both sides turn golden and crisp up nicely.
- → Can I make moong dal chilla gluten-free?
Yes, the traditional batter is naturally gluten-free since it contains only lentils, water, vegetables, and spices.