 Save
Save
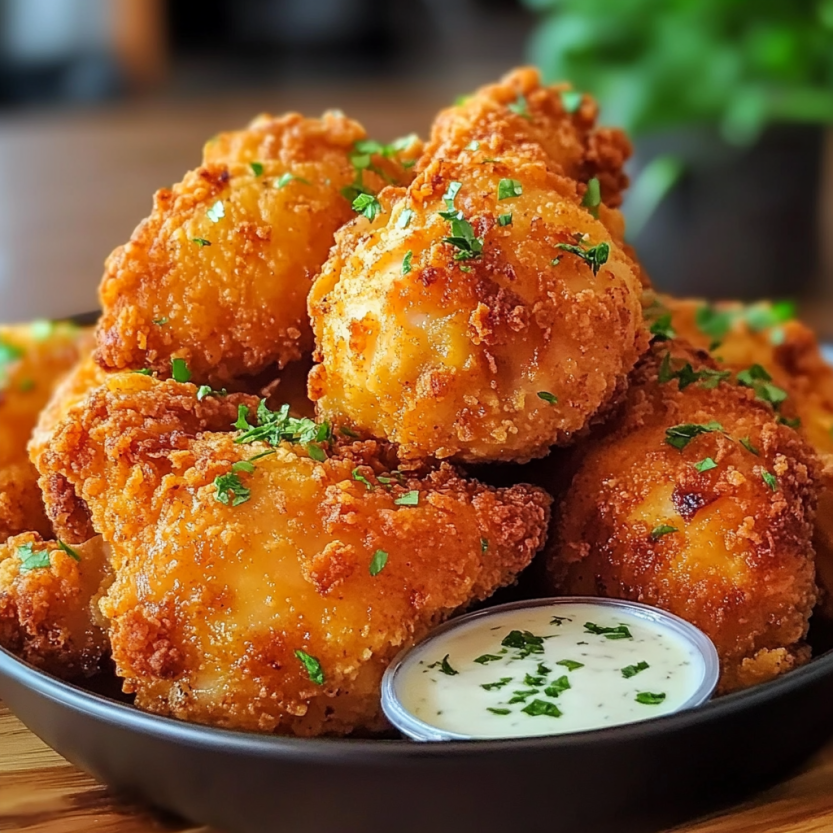
This buttermilk oven fried chicken transforms the classic comfort food into a healthier version without sacrificing that crispy, golden exterior we all crave. My family requests this dish at least twice a month, and I love that I can satisfy their fried chicken cravings without dealing with a splatter-filled stovetop or excess oil.
I developed this recipe during a particularly hectic period when I was looking for shortcuts that didn't compromise on taste. Three years later, it remains my go-to solution when the fried chicken craving hits but I want something lighter.
Ingredients
- Chicken thighs: bone in and skin on for maximum flavor and juiciness. The skin crisps up beautifully while protecting the meat
- Buttermilk: tenderizes the chicken while adding tanginess. Its acidity breaks down proteins for more tender results
- Cornflakes: adds extraordinary crunch that stays crispy in the oven. Look for unsweetened varieties
- Flour: creates the base for your coating that browns beautifully
- Spice blend: garlic powder, onion powder, paprika and cayenne build layers of flavor without being overwhelming
- Baking powder: the secret ingredient that helps the coating crisp up in the oven
- Melted butter: brushed on top helps achieve that golden finish and adds richness
Step-by-Step Instructions
- Marinate the Chicken:
- Submerge chicken pieces completely in buttermilk, ensuring each piece is fully coated. Allow to soak for at least 4 hours, but for best results, leave overnight in the refrigerator. The longer marinating time allows the acids in the buttermilk to break down proteins and infuse flavor throughout the meat.
- Prepare the Coating:
- Mix the dry ingredients thoroughly in a shallow dish to ensure spices are evenly distributed. The cornflakes should be crushed to varying sizes from fine crumbs to small pieces to create texture variation in the final crust. For optimal seasoning, taste a small pinch of the mix and adjust salt or spices if needed.
- Dredge the Chicken:
- Remove chicken from buttermilk allowing excess to drip off completely. This prevents soggy coating. Dip each piece in beaten egg ensuring complete coverage, then press firmly into the coating mixture on all sides. For extra crispiness, let the coated pieces rest on a wire rack for 5 minutes before baking.
- Bake to Perfection:
- Arrange chicken pieces on the rack with at least an inch between pieces to allow air circulation. Drizzle or brush with melted butter evenly across the top surface. Bake in the top third of the oven where heat is most intense for maximum browning. Do not open the oven during the first 30 minutes to maintain temperature.
My absolute favorite thing about this recipe is the cornflake coating. I discovered it by accident when I ran out of breadcrumbs one evening, and now I would never go back. The way they maintain their crunch through baking is nothing short of magical, especially when combined with that hit of paprika and garlic.
Make Ahead Options
This chicken can be prepared in stages if you're short on time. Marinate the chicken up to 24 hours in advance, and you can even mix the dry coating ingredients the day before. For maximum crispiness, however, coat the chicken just before baking. If you need to make it completely ahead, the chicken reheats surprisingly well in a 350°F oven for about 15 minutes until warmed through. The coating won't be quite as crispy as fresh, but still delicious.
Perfect Pairings
The beauty of this oven fried chicken lies in its versatility when serving. For a classic comfort meal, pair with mashed potatoes and coleslaw. The creamy potatoes complement the crispy texture while the tangy slaw cuts through the richness. For a lighter option, serve alongside a bright arugula salad with lemon vinaigrette. The chicken also works beautifully cold for picnics or packed lunches the next day, retaining much of its flavor and some of its crunch.
Troubleshooting Tips
If your chicken coating isn't as golden as you'd like, brush with a bit more butter halfway through cooking or switch the oven to broil for the final 2 minutes, watching carefully to prevent burning. For those finding the coating too pale, make sure your oven is fully preheated before adding the chicken. If your coating falls off during baking, you likely didn't press it firmly enough onto the chicken or the buttermilk marinade wasn't fully drained. Patting the chicken nearly dry after removing from the marinade helps the egg wash and coating adhere properly.
 Save
Save
 Save
Save
Recipe Questions
- → How long should I marinate the chicken in buttermilk?
For best results, marinate the chicken in buttermilk for at least 4 hours. For maximum tenderness and flavor, overnight marination (8-12 hours) is ideal. The acid in the buttermilk helps tenderize the meat while infusing it with tangy flavor.
- → Can I use boneless chicken instead of bone-in?
Yes, you can substitute boneless chicken pieces, but you'll need to adjust the cooking time. Boneless chicken cooks faster than bone-in pieces. Check for doneness around 25-30 minutes, ensuring the internal temperature reaches 165°F (74°C).
- → What makes the coating crispy without deep frying?
The combination of cornflakes (or cornmeal), baking powder, and high oven temperature (425°F) creates a crispy exterior. The cornflakes add texture, baking powder helps with browning, and the high heat quickly sets the coating. The drizzle of butter or oil adds just enough fat for that golden finish.
- → What sides pair well with this chicken?
This chicken pairs beautifully with classic sides like mashed potatoes, coleslaw, corn on the cob, or mac and cheese. For a lighter meal, serve with a fresh green salad, roasted vegetables, or steamed green beans.
- → Can I make this ahead of time?
While best enjoyed fresh from the oven, you can prepare the components ahead of time. Marinate the chicken overnight and mix the dry coating ingredients in advance. For leftovers, reheat in a 350°F oven for 15-20 minutes to help restore some crispiness.
- → What if I don't have buttermilk?
Make a quick substitute by adding 1 tablespoon of lemon juice or white vinegar to 1 cup of regular milk. Let it sit for 5-10 minutes until slightly thickened. This homemade version works well for the marinade.